[Guides & How-tos]
[Guides & How-tos]
How to Create a New Card in Amorfs Studio
How to Create a New Card in Amorfs Studio
How to Create a New Card in Amorfs Studio
8 Jan 2026
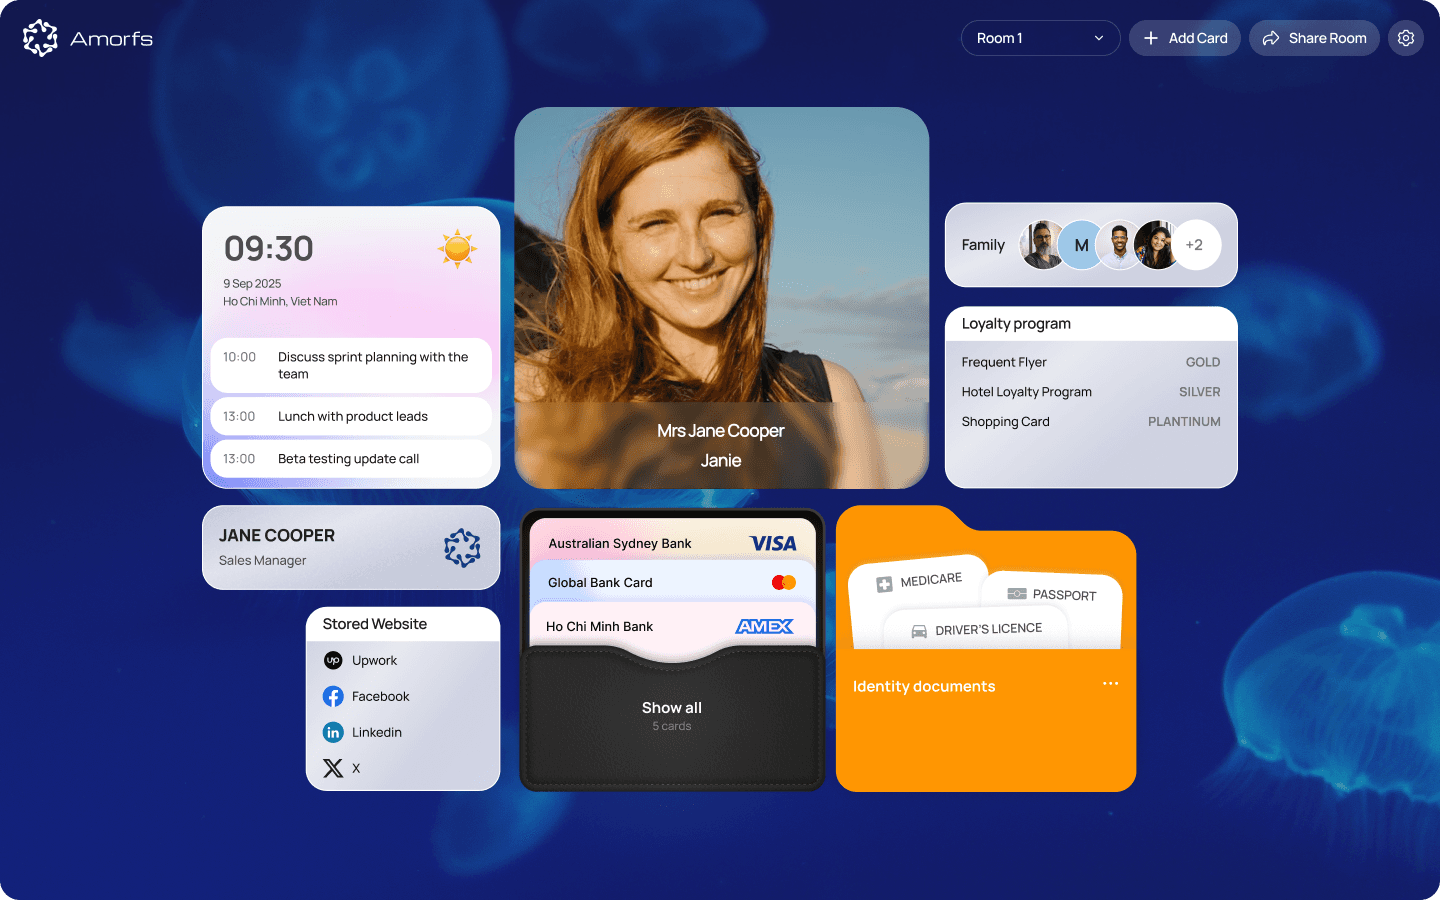
Creating a card in Amorfs Studio is simple.
Even if the format looks unfamiliar at first, don’t worry! We’re here to make sure that you can get started like a pro (without needing to be a developer).
Step 1: Go to the room where you want the card
Open Amorfs Studio and enter the room where you want to add a new card.
Each card lives inside a room, so make sure you’re in the right one before starting.
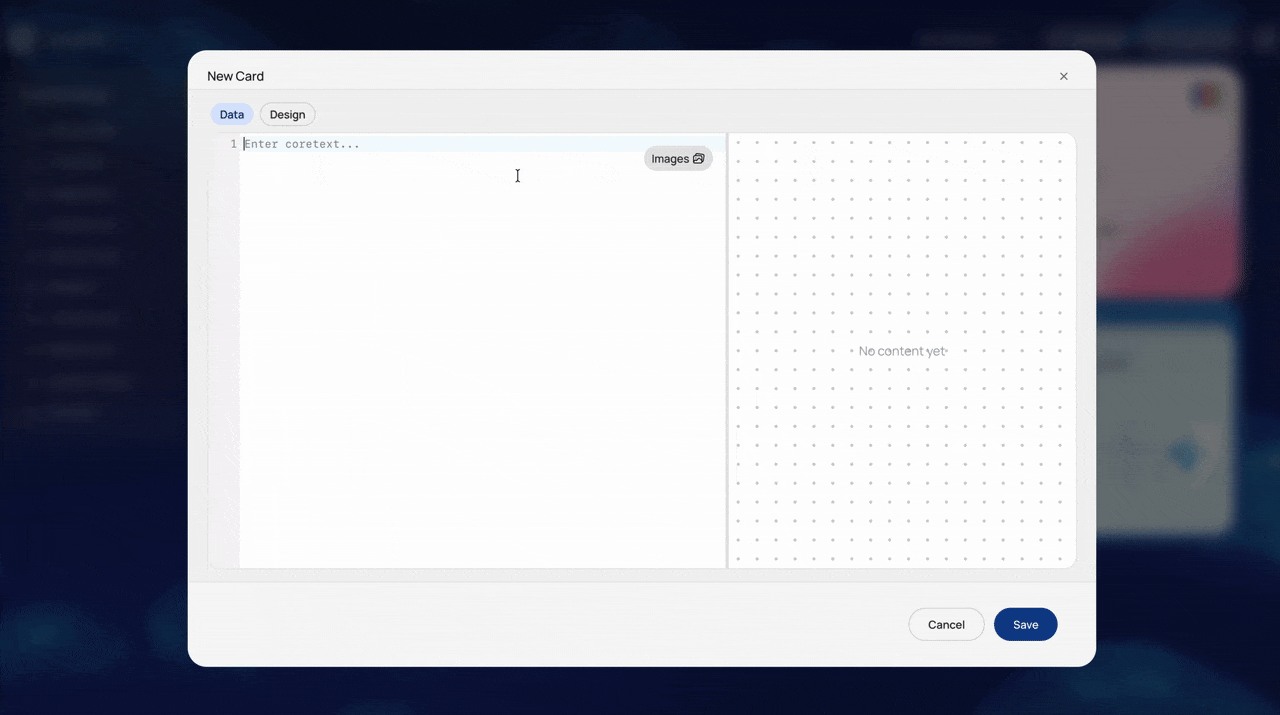
Step 2: Click Create Card
Click the Create Card button in the top-right corner.
A blank card editor will open.
This is where you’ll enter your data

Step 3: Write your data using the Amorfs format
In the editor, type your information using the Amorfs format.
Basic rules:
- Use - to mean “has a”
- Use [ ] to describe details
- Each part ends with ]
Example:
Contact card [
- name [Jane Cooper]
- role [Sales manager]
- email [jane@work.com]
]
Want to understand this format more deeply?
Read More: Reading Your First Amorfs Document
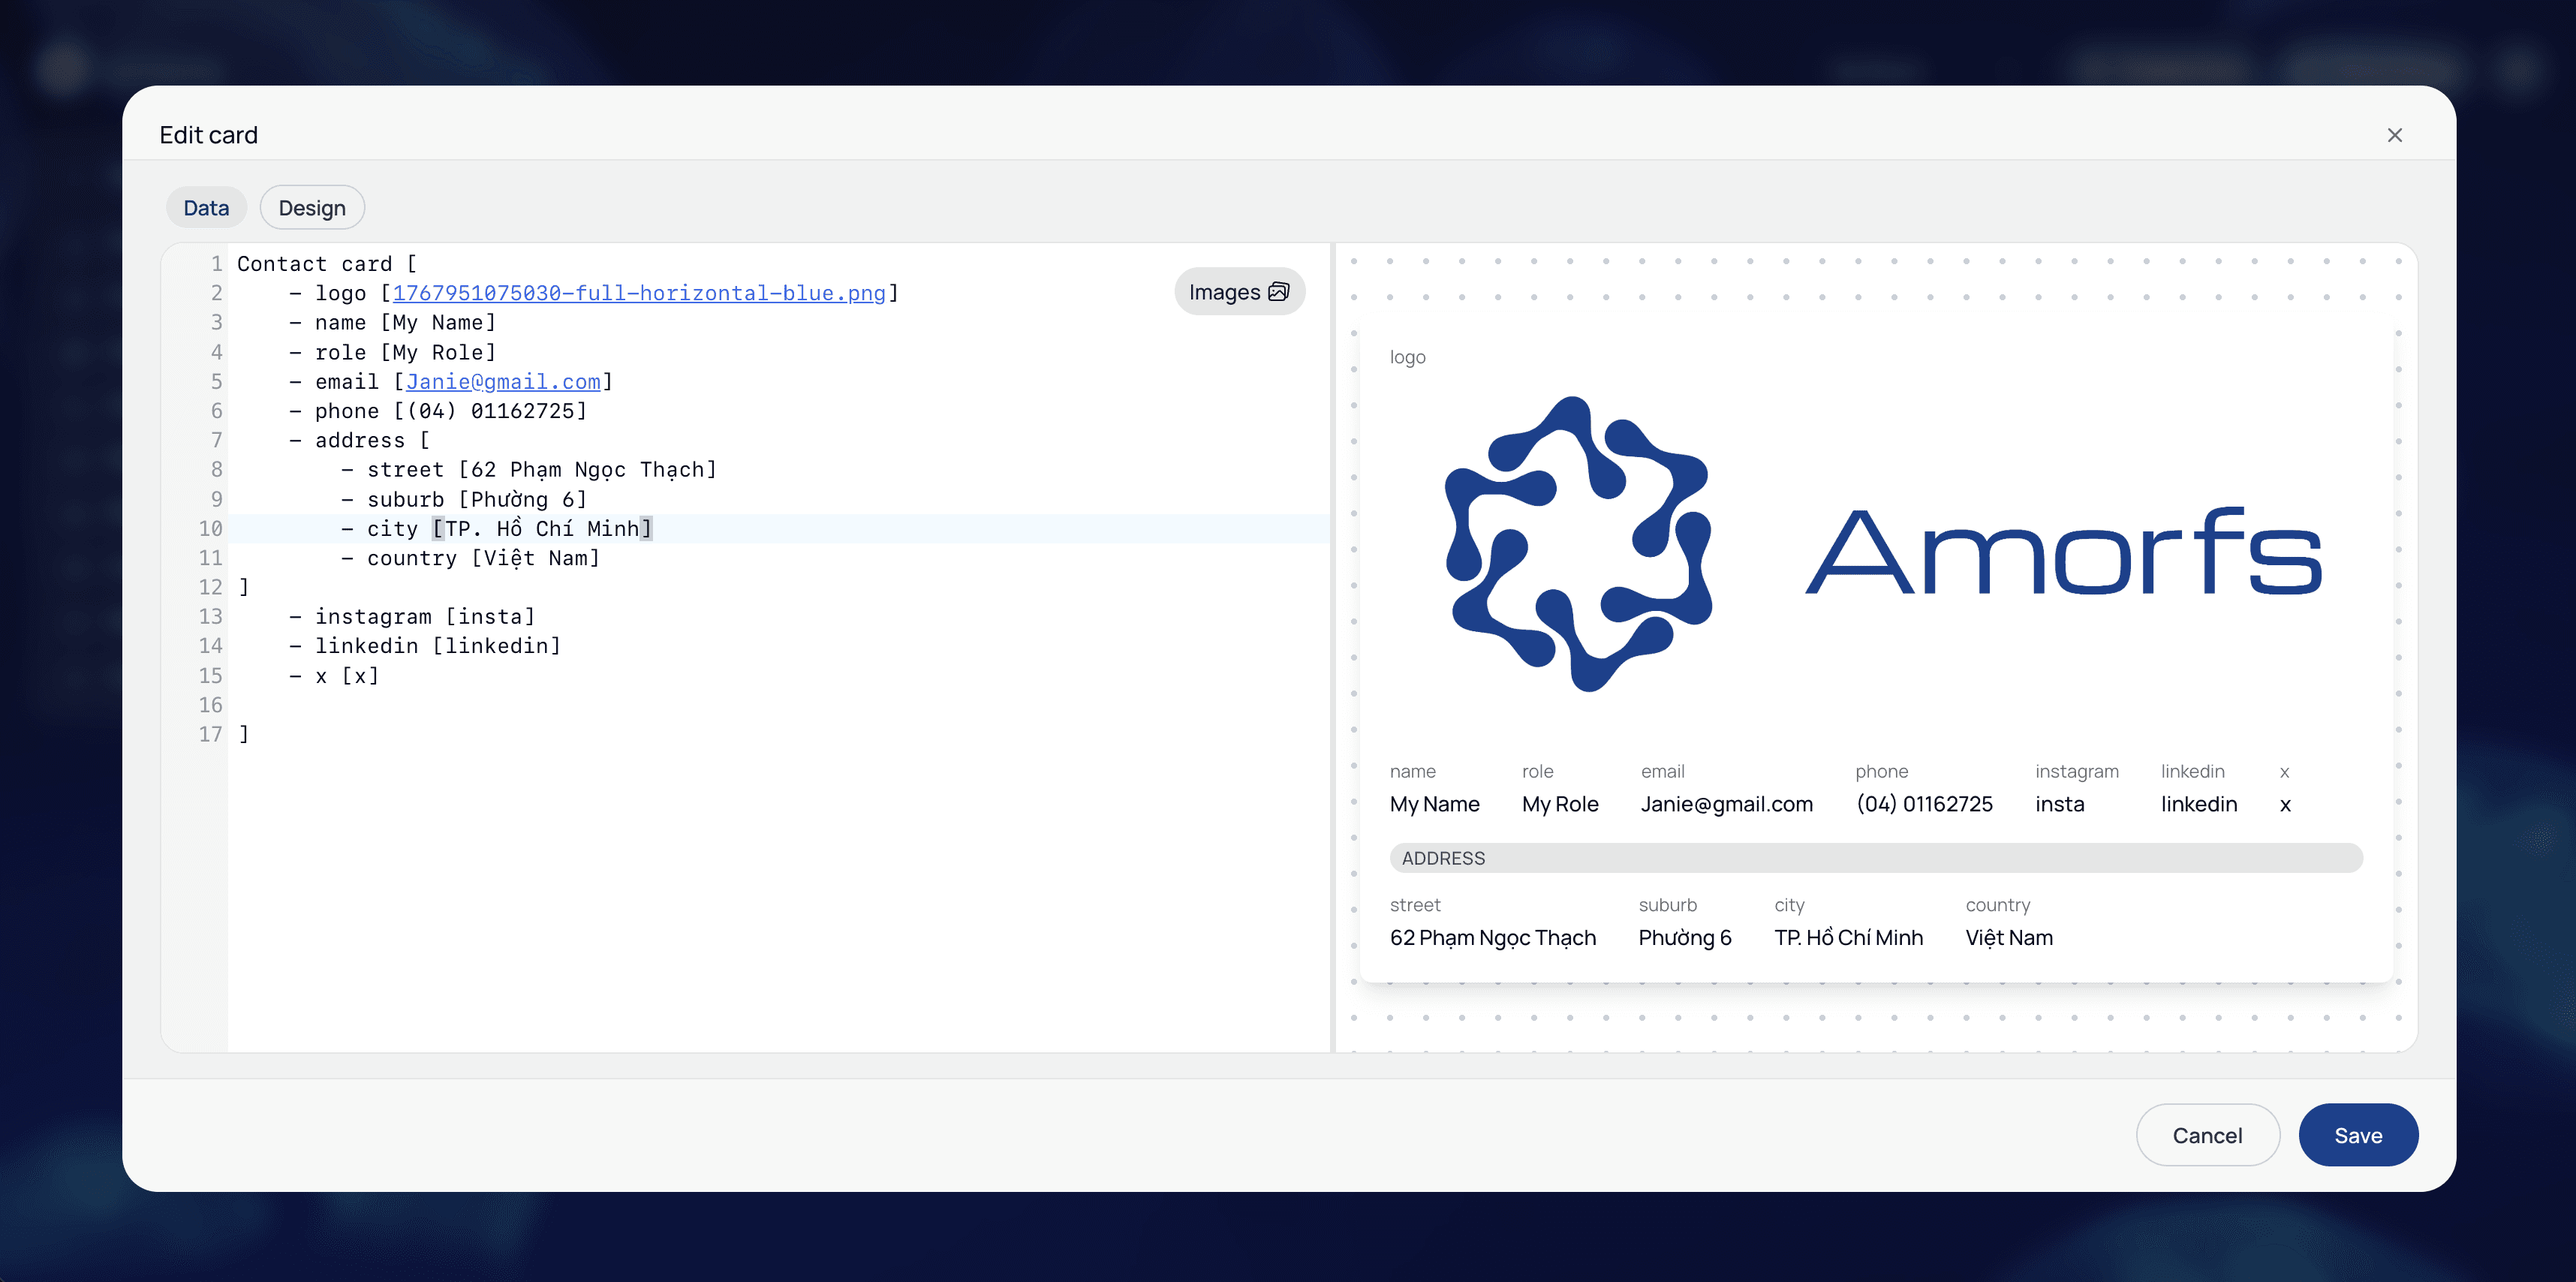
Step 4: Edit directly on the card preview
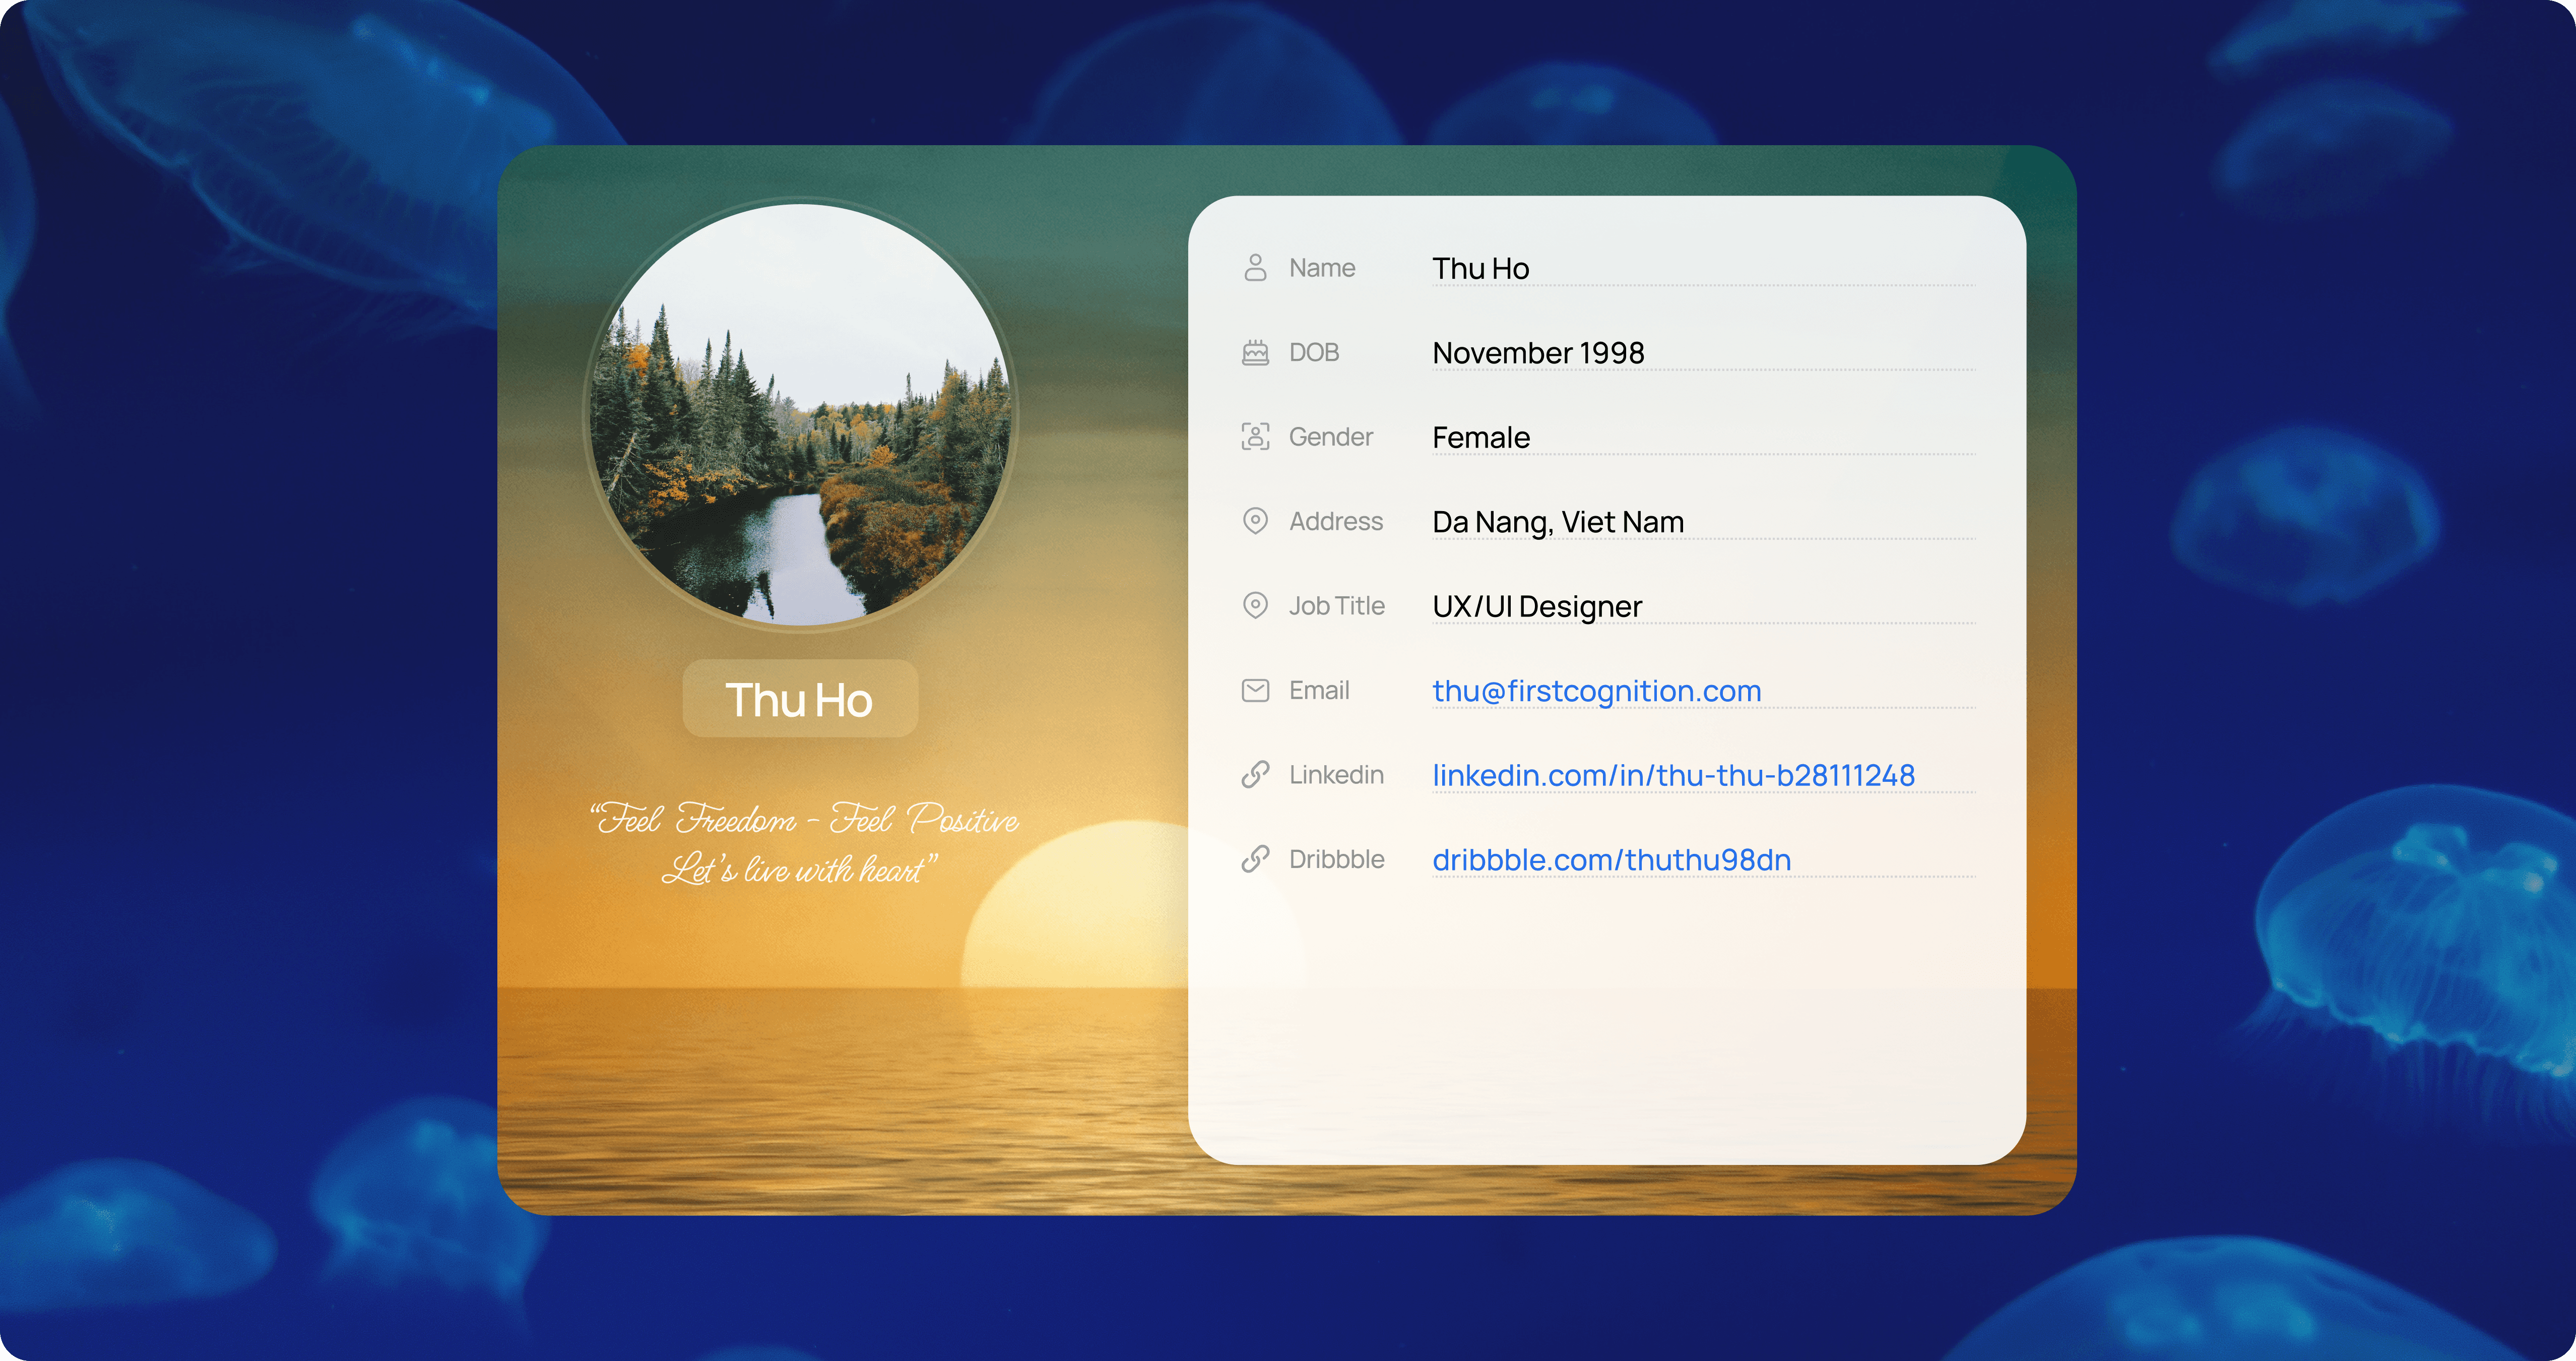
While editing a card, you’ll see a live preview on the right side of the screen. This preview shows how your card will look in Amorfs Studio.
You can edit your card directly from this preview.
Here’s how it works:
- Double-click any text on the card preview (for example, the model or the year)
- Edit or delete the text
- The data in the editor will update automatically
For quick fixes, this lets you adjust content visually without touching the format.
If you make a mistake, use Ctrl + Z (or Cmd + Z) to undo at any time.

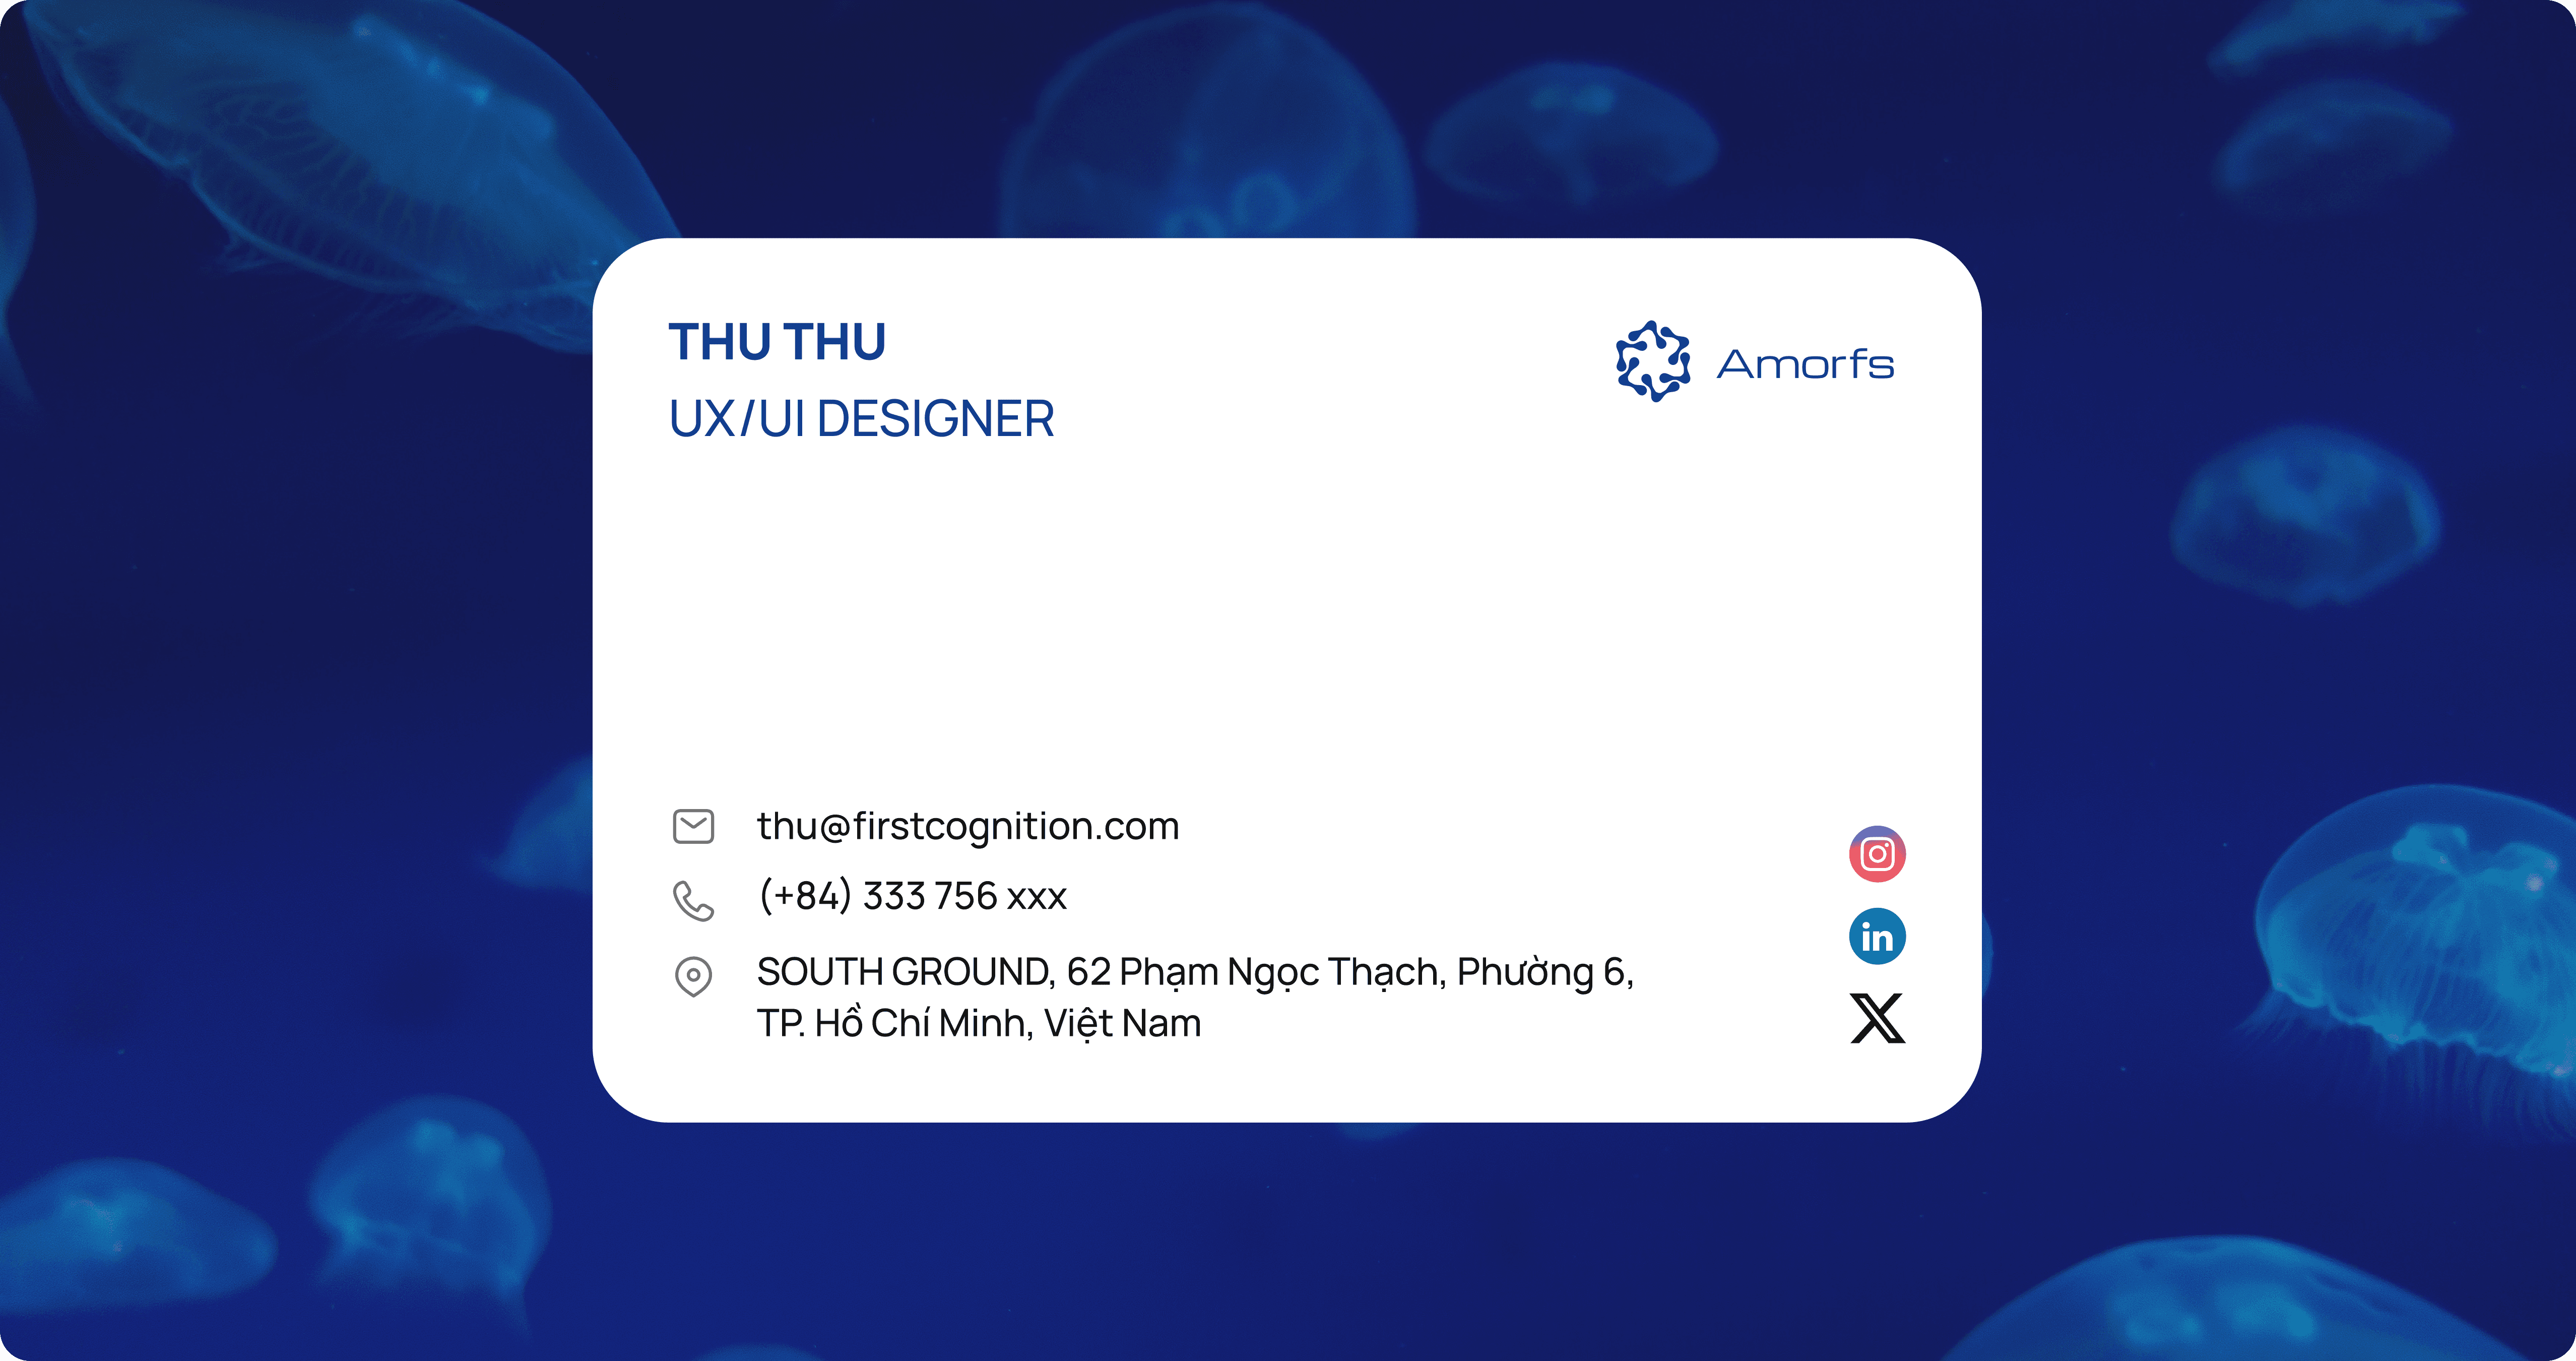
Step 5 (Optional): Add an image
Images are optional, but they help make cards clearer and more visual.
To add an image:
1. Open the Image Library in the top-right corner of the card editor
2. Click Upload and select an image from your device (for example, a profile photo or a logo)
3. Your image will appear in the Image Library as a thumbnail
4. Click the Copy icon on the image thumbnail
5. In the card editor, place your cursor inside the image [ ] line
6. Paste the copied image reference into the brackets
7. Save your card
The image will now be part of your card data and visible in Studio.

Step 6: Save your card
Click Save, and your card will appear in the room immediately.
If there’s an error, the card will still be saved and visible, but it won’t render correctly until the error is fixed.

That’s it!
You’ve created your first card in Amorfs Studio!
Take a moment to explore, tweak your data, or try another card.
What to learn how to design, customize, and visually refine your cards to match your style?
Read Next: Styling your card
Need help or have questions? Reach out to us anytime at contact@amorfs.com, or connect with us through our social channels in the footer.
Creating a card in Amorfs Studio is simple.
Even if the format looks unfamiliar at first, don’t worry! We’re here to make sure that you can get started like a pro (without needing to be a developer).
Step 1: Go to the room where you want the card
Open Amorfs Studio and enter the room where you want to add a new card.
Each card lives inside a room, so make sure you’re in the right one before starting.
Step 2: Click Create Card
Click the Create Card button in the top-right corner.
A blank card editor will open.
This is where you’ll enter your data
Step 3: Write your data using the Amorfs format
In the editor, type your information using the Amorfs format.
Basic rules:
- Use - to mean “has a”
- Use [ ] to describe details
- Each part ends with ]
Example:
Contact card [
- name [Jane Cooper]
- role [Sales manager]
- email [jane@work.com]
]
Want to understand this format more deeply?
Read More: Reading Your First Amorfs Document
Step 4: Edit directly on the card preview
While editing a card, you’ll see a live preview on the right side of the screen. This preview shows how your card will look in Amorfs Studio.
You can edit your card directly from this preview.
Here’s how it works:
- Double-click any text on the card preview (for example, the model or the year)
- Edit or delete the text
- The data in the editor will update automatically
For quick fixes, this lets you adjust content visually without touching the format.
If you make a mistake, use Ctrl + Z (or Cmd + Z) to undo at any time.
Step 5 (Optional): Add an image
Images are optional, but they help make cards clearer and more visual.
To add an image:
1. Open the Image Library in the top-right corner of the card editor
2. Click Upload and select an image from your device (for example, a profile photo or a logo)
3. Your image will appear in the Image Library as a thumbnail
4. Click the Copy icon on the image thumbnail
5. In the card editor, place your cursor inside the image [ ] line
6. Paste the copied image reference into the brackets
7. Save your card
The image will now be part of your card data and visible in Studio.
Step 6: Save your card
Click Save, and your card will appear in the room immediately.
If there’s an error, the card will still be saved and visible, but it won’t render correctly until the error is fixed.
That’s it!
You’ve created your first card in Amorfs Studio!
Take a moment to explore, tweak your data, or try another card.
What to learn how to design, customize, and visually refine your cards to match your style?
Read Next: Styling your card
Need help or have questions? Reach out to us anytime at contact@amorfs.com, or connect with us through our social channels in the footer.
Share to
Latest Post
View All
[User Stories]
Designer's Experience - 👩💻 How I turned a Figma Design into something I actually use
14 Jan 2026
[User Stories]
Designer's Experience - 👩💻 How I turned a Figma Design into something I actually use
14 Jan 2026
[User Stories]
Designer's Experience - 👩💻 How I turned a Figma Design into something I actually use
14 Jan 2026
[User Stories]
Designer's Experience - 👩💻 From Figma to a profile that’s ready to live
14 Jan 2026
[User Stories]
Designer's Experience - 👩💻 From Figma to a profile that’s ready to live
14 Jan 2026
[User Stories]
Designer's Experience - 👩💻 From Figma to a profile that’s ready to live
14 Jan 2026
[Product Updates]
Welcome to Amorfs Studio
26 Dec 2025
[Product Updates]
Welcome to Amorfs Studio
26 Dec 2025
[Product Updates]
Welcome to Amorfs Studio
26 Dec 2025


PRODUCTS
Amorfs Extension
SUPPORT
Don’t want to miss anything?
Get weekly updates on the newest posts, events and tips right in your mailbox.
" height="47.8243px" id="Fi98aqQOS" width="48.001px"/><path d="M 20.148 22.45 L 21.494 15.115 L 13.655 15.115 L 13.655 12.521 C 13.655 8.646 15.176 7.155 19.111 7.155 C 20.333 7.155 21.317 7.185 21.883 7.244 L 21.883 0.596 C 20.81 0.298 18.186 0 16.666 0 C 8.646 0 4.949 3.786 4.949 11.955 L 4.949 15.115 L 0 15.115 L 0 22.45 L 4.949 22.45 L 4.949 38.409 C 6.805 38.869 8.747 39.115 10.746 39.115 C 11.73 39.115 12.701 39.055 13.654 38.94 L 13.654 22.45 L 20.147 22.45 Z" fill="rgb(255, 255, 255)" height="39.11523px" id="o10gvlFLv" transform="translate(13.253 8.885)" width="21.883200000000002px"/></g></svg>)
PRODUCTS
Amorfs Extension
SUPPORT
Don’t want to miss anything?
Get weekly updates on the newest posts, events and tips right in your mailbox.
PRODUCTS
Amorfs Extension
SUPPORT
Don’t want to miss anything?
Get weekly updates on the newest posts, events and tips right in your mailbox.
PRODUCTS
Amorfs Extension
SUPPORT
Don’t want to miss anything?
Get weekly updates on the newest posts, events and tips right in your mailbox.